
Cleaning your hummingbird feeder is a crucial task that many bird enthusiasts tend to overlook. As a fellow bird lover, I understand the excitement of watching these fascinating little creatures flit about your yard. But, did you know that neglecting to clean their feeders regularly can pose serious health risks to our feathered friends?
In this post, we’ll dive into the essential question: how often to clean hummingbird feeder? Keep reading to uncover not only the recommended cleaning frequency but also helpful tips and tricks for maintaining a safe and sanitary feeding environment that will keep these charming visitors coming back for more.
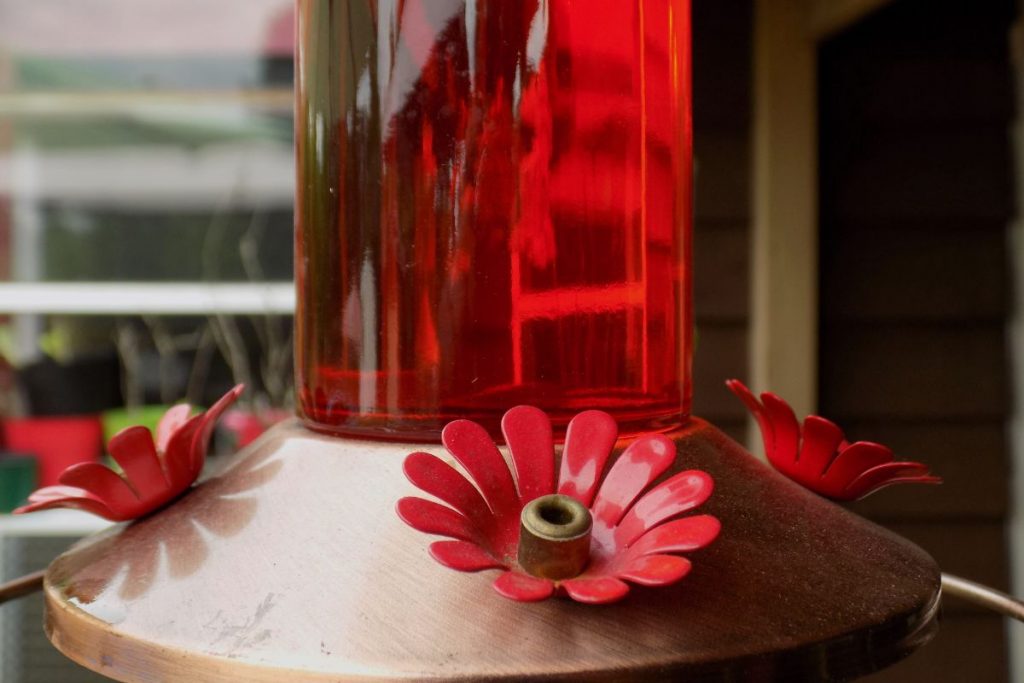
How Often Should You Clean Your Hummingbird Feeder?
You should clean your hummingbird feeder at least once every three to five days. In hotter climates or during warmer months, it’s recommended to clean the feeder every two days to prevent fermentation and bacterial growth. Regular cleaning ensures a safe and healthy environment for the hummingbirds to feed.
- How Often Should You Clean Your Hummingbird Feeder?
- What Are the General Guidelines for Cleaning Hummingbird Feeders?
- How Can I Clean My Hummingbird Feeder?
- Step 1: Empty the Feeder
- Step 2: Disassemble the Feeder (Refer to point 2 discussed above)
- Step 3: Prepare Cleaning Solution (Refer to point 3)
- Step 4: Soak and Scrub (Refer to points 4 and 5)
- Step 5: Dry and Reassemble (Refer to point 6)
- Step 6: Refill with Fresh Nectar (Refer to point 7)
- Helpful Tips:
- Maintenance Tricks:
- What Should I Avoid When Cleaning My Hummingbird Feeder?
- Conclusion
- Post Images – How Often To Clean Hummingbird Feeder?
Related Posts:
Best Hummingbird Feeders.
Hummingbird Feeders Comprehensive Guide.

What Are the General Guidelines for Cleaning Hummingbird Feeders?
Proper maintenance of hummingbird feeders is essential to ensure the health and safety of these delightful birds. To provide a clean and welcoming environment for your winged visitors, follow these general guidelines for cleaning hummingbird feeders:
- Frequency: Clean your hummingbird feeder at least once every three to four days or even more frequently during hot weather conditions. This prevents the growth of mould and harmful bacteria, which can make hummingbirds sick.
- Disassemble: Begin by taking apart the feeder to ensure you can thoroughly clean all the components. This is especially important for feeders with multiple feeding ports, as mould and debris can accumulate in small, hard-to-reach crevices.
- Use Warm, Soapy Water: Prepare a solution of warm water mixed with mild dish soap. Avoid using harsh chemicals or bleach, as they can be harmful to hummingbirds. Soak the feeder components in soapy water for a few minutes to loosen any stubborn debris.
- Scrubbing: Use a soft brush or sponge to gently scrub the feeder components, paying close attention to feeding ports, perches, and reservoirs. You can also use a pipe cleaner or specialized hummingbird feeder cleaning brush to reach tight spots.
- Rinse Thoroughly: Once you’ve removed all the grime, make sure to rinse the feeder components thoroughly with clean water to wash away any soap residue.
- Dry Completely: Allow the feeder components to air dry before reassembling. A completely dry feeder will prevent the growth of mould and bacteria.
- Refill with Fresh Nectar: Always use fresh nectar when refilling your feeder. Avoid topping off old nectar, as it can encourage bacterial growth and spoilage.
- Observe for Cloudiness: Keep an eye on the nectar in your feeder. If it appears cloudy or discoloured, it’s a sign that the nectar has spoiled and the feeder needs immediate cleaning.
Related post to read: Are Hummingbird Feeders Dishwasher Safe?
How Can I Clean My Hummingbird Feeder?
In order to clean your hummingbird feeder effectively, follow these step-by-step instructions. Some of these steps have been discussed in the previous section above, so I will reference them accordingly.
Step 1: Empty the Feeder
Begin by emptying any remaining nectar from the feeder. This ensures that you can start with a fresh batch of nectar after cleaning.
Step 2: Disassemble the Feeder (Refer to point 2 discussed above)
Take apart the feeder to ensure you can thoroughly clean all components.
Step 3: Prepare Cleaning Solution (Refer to point 3)
Prepare a solution of warm water mixed with mild dish soap.
Step 4: Soak and Scrub (Refer to points 4 and 5)
Soak the feeder components in the soapy water for a few minutes, then use a soft brush or sponge to gently scrub each part. Rinse thoroughly with clean water.
Step 5: Dry and Reassemble (Refer to point 6)
Allow the feeder components to air dry before reassembling.
Step 6: Refill with Fresh Nectar (Refer to point 7)
Refill the feeder with fresh nectar, avoiding topping off old nectar.
Helpful Tips:
- Create a cleaning schedule to help you remember when it’s time to clean the feeder.
- Replace any damaged or worn-out components to ensure your feeder remains functional and safe for the birds.
- Consider using a nectar guard or ant moat to keep insects away from the feeder, ensuring a cleaner environment for the hummingbirds.
Maintenance Tricks:
- Regularly inspect your feeder for signs of wear or damage, and repair or replace parts as needed.
- Monitor the nectar level and quality, replacing it more frequently during hot weather or if it appears cloudy or discoloured.
- Rotate multiple feeders in your yard, allowing you to clean and refill them without depriving the hummingbirds of a food source.
By following this step-by-step guide and incorporating the helpful tips and maintenance tricks, you can ensure your hummingbird feeder remains clean and safe for your winged visitors.
Related post to read: How To Stop A Hummingbird Feeder From Leaking.
What Should I Avoid When Cleaning My Hummingbird Feeder?
When cleaning your hummingbird feeder, it’s important to be mindful of certain practices that can be detrimental to the feeder’s condition or the health of the hummingbirds. Here’s a list of things you should avoid:
- Using Harsh Chemicals: Refrain from using bleach, ammonia, or other harsh chemicals, as these can leave harmful residues that can endanger the hummingbirds. Stick to mild dish soap and warm water for cleaning.
- Ignoring Small Parts: Don’t overlook small components like feeding ports and perches. Make sure to thoroughly clean these parts, as they are common areas for mould and bacteria to grow.
- Incomplete Rinsing: Ensure that you thoroughly rinse all feeder components after cleaning to remove any soap residue. Incomplete rinsing can contaminate the nectar and be harmful to the birds.
- Reusing Old Nectar: Avoid topping off old nectar when refilling the feeder. Always replace the nectar with a fresh batch to prevent spoilage and bacterial growth.
- Not Drying Thoroughly: Make sure to let the feeder components air dry completely before reassembling. A damp environment can promote mould and bacteria growth, posing a risk to the hummingbirds.
- Using Abrasive Cleaning Tools: Avoid using abrasive scrubbers or brushes that can damage the feeder’s surface. Stick to soft brushes, sponges, or pipe cleaners for gentle cleaning.
- Ignoring Manufacturer’s Instructions: Don’t overlook any specific cleaning instructions provided by the feeder’s manufacturer. These guidelines are designed to help you maintain the feeder in the best possible condition.
By keeping the points discussed above in mind and avoiding these common pitfalls, you can ensure your hummingbird feeder remains clean, safe, and welcoming for your feathered friends.
Conclusion
In conclusion, understanding how often to clean hummingbird feeder is vital for the well-being of your enchanting visitors. As a bird lover, it’s your responsibility to provide a safe and hygienic environment that keeps them healthy and happy.
Regular cleaning, mindful of the tips and precautions discussed, will ensure your feeder remains a delightful haven for these captivating creatures. As you embark on this rewarding journey, you might discover additional tips and tricks along the way.
Now over to you. How often do you clean your hummingbird feeder? Feel free to leave your comments in the comment section below!
Post Images – How Often To Clean Hummingbird Feeder?

References: